Blog
How to Import a Voiceover and SRT Captions into CapCut Web
Follow a tested CapCut Web workflow to upload an MP3 voiceover and SRT captions, check timing, and export an MP4.
This guide shows how to add a generated voiceover and an SRT caption file to CapCut Web, check that both start at the beginning of the timeline, and export an MP4. We tested the steps in Chrome on October 15, 2026. The interface did not show a build number, so these instructions describe the web editor we used and may differ from CapCut desktop or mobile.
The TTSMint team generated the audio and captions from the same 216-character English script using Fern Oasis at the default settings. The MP3 is 14.4 seconds long and its SRT contains 37 word-level cues. You can use these exact files to follow along.
Watch the exported import check
This exported CapCut project uses a plain black background so you can check the imported voiceover and word-level captions. Add your own footage and adjust caption layout for your finished video.
You can download the exact files used in this check:
The upload menu in this CapCut Web check listed .srt, .ass, and .lrc caption files. It did not list .vtt, so the tested caption workflow below uses the SRT. This describes the interface we saw and does not establish that every CapCut version excludes VTT.
Before you start
Have the voiceover and captions ready as separate files. In this example they were generated from one script, but you can use your own MP3 and SRT pair. Create a voiceover and SRT captions from your script with TTSMint.
If you use the sample files above, note that the SRT is word-level. You may want to combine short cues into readable phrases and add punctuation before exporting your own video.
1. Open a CapCut Web project
Sign in to CapCut in Chrome and open Video Editor. Open an existing project or start a new one. In this check, the editor required a signed-in session.
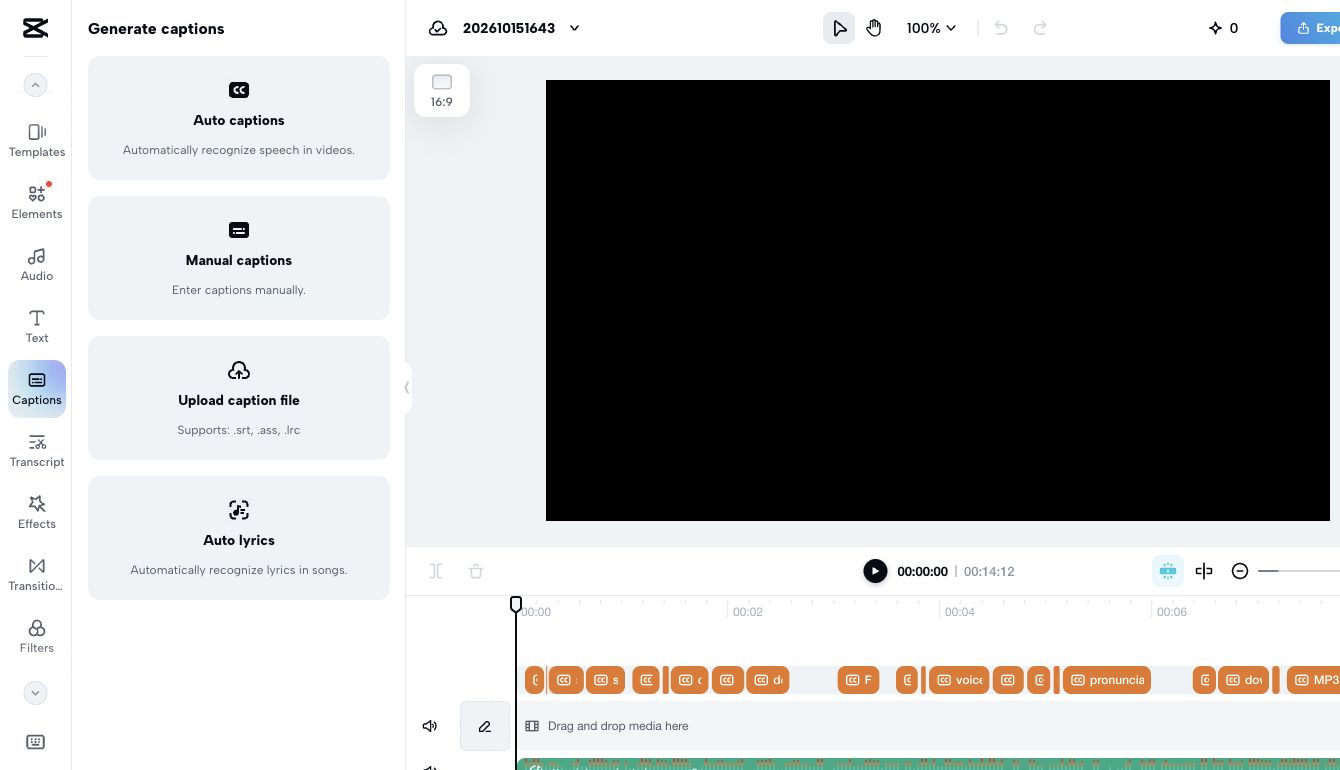
2. Upload the SRT caption file
- Open Captions in the editor.
- Choose Upload caption file.
- Select the
.srtfile from your device and wait for the upload to finish. - Confirm that a caption track appears on the timeline.
The sample SRT created 37 caption cues. In our check, the file began at 0.075 seconds and its last cue ended at 14.05 seconds. The video editor displayed the individual word cues. Review the text, punctuation, and cue lengths for your intended reading pace; the import succeeding does not mean the captions are ready to publish unchanged.
3. Upload the MP3 and add it to the timeline
- Open Media.
- Open the Upload menu, then choose Upload from device.
- Select the MP3 voiceover and wait for its thumbnail to finish uploading.
- Click the audio thumbnail. In the tested interface, the thumbnail showed Added and the audio clip appeared on the timeline.
- Check that the clip starts at 0, aligned with the caption track.
Uploading the media file alone did not place it on the timeline in this workflow; clicking the thumbnail completed that step.
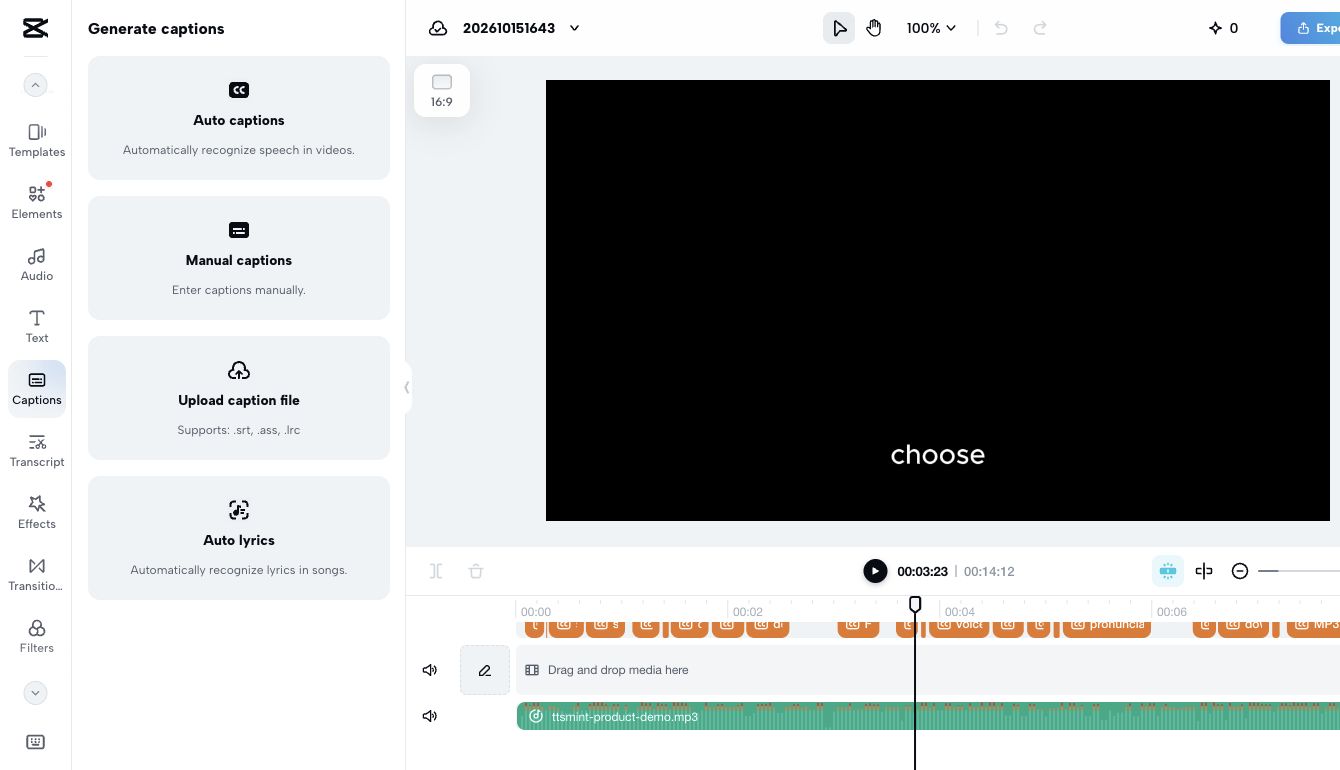
4. Check the beginning, middle, and end
Play the timeline from 0 and verify that the voice starts with the first caption. Then inspect a point in the middle and the final seconds. Check that the audio continues to the end, the captions stay in sync, and the words are readable at the pace of the voice.
The test clip played through its full 14.4-second duration. Its captions appeared as individual words, so combine cues and restore punctuation if your edit calls for phrase- or sentence-level subtitles. Do not rely on the imported timing without watching the full clip in the target editor.
5. Export and confirm the file
- Choose Export, then Download.
- In this check, the export settings were 720p, Recommended, 30fps, and MP4.
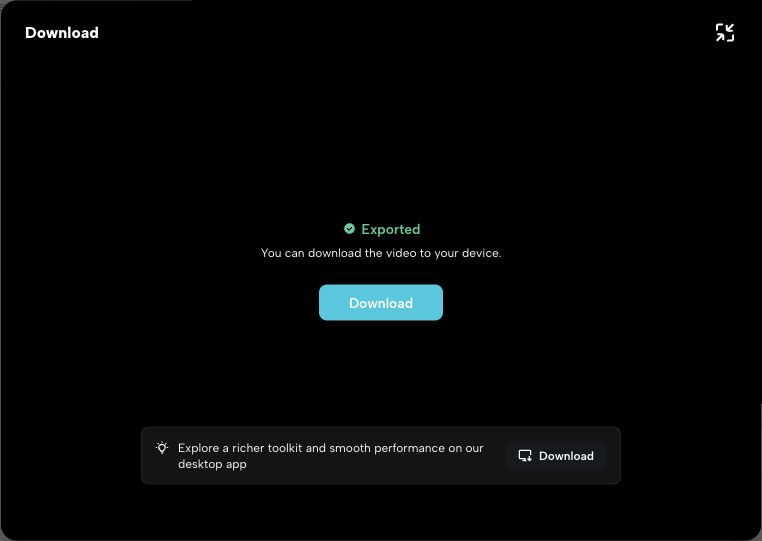
- Select Export and wait for the completion state.
- Play the downloaded file and confirm that both audio and captions are present.
CapCut showed Exported when the test finished. The downloaded MP4 was 1280 × 720 with H.264 video and AAC audio, lasting about 14.47 seconds. Play your exported file once to check the final result.
If the media panel stays on loading
The Media panel remained on a loading state during the first attempt. Reloading the saved project made the panel available, and the existing uploads could then be used; the voiceover did not need to be generated again. Save the project before reloading so you can reopen it.
Replace the voiceover or captions later
If you change the script or regenerate the speech, replace both the MP3 and its matching SRT. Then check the beginning, middle, and end again. A changed voice, duration, or subtitle segmentation can affect how the captions line up, even when the file names look similar.
What this check confirms
The tested CapCut Web session accepted the SRT, placed the MP3 at the start of the timeline, played the source, and exported them together. Menu names and available formats can change across CapCut versions. This tutorial is independently produced by the TTSMint team; it is not an official CapCut integration.